By StrikeGear Team
Updated July 22, 2026 47 min read
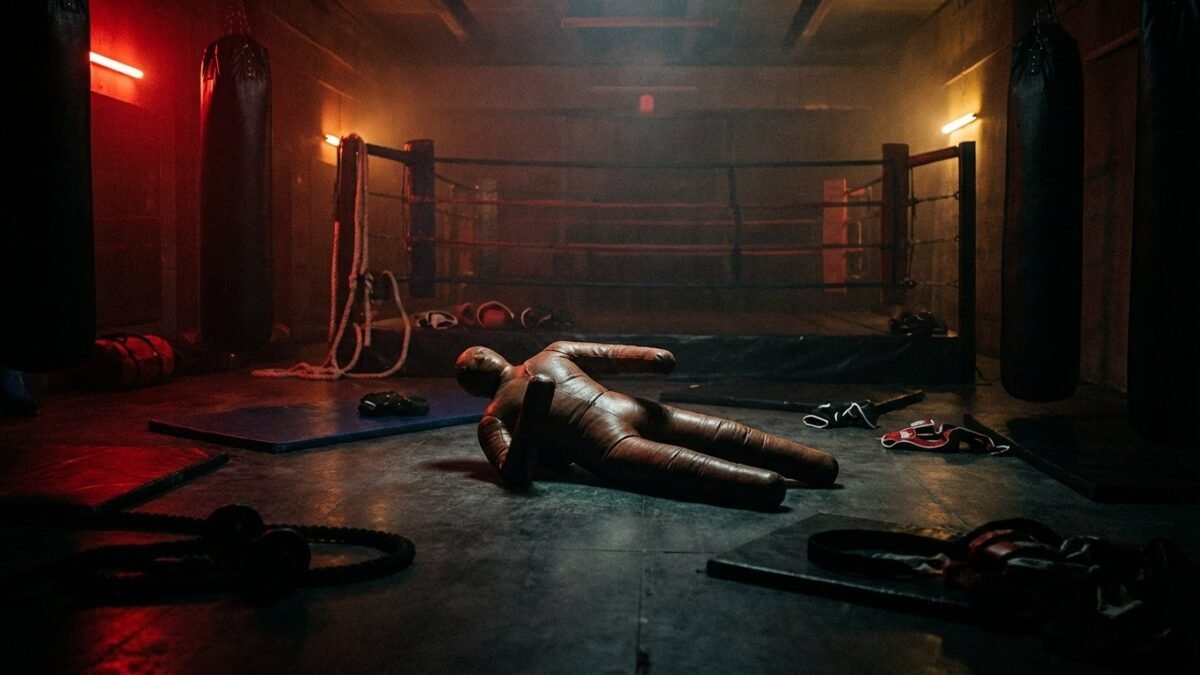
Training partners aren’t always available when you want to drill. Whether you’re a BJJ purple belt working late-night submissions, an MMA fighter perfecting takedowns between sparring sessions, or a wrestling coach who needs a demo partner that never gets tired — a quality grappling dummy solves the problem. The right dummy lets you drill throws, submissions, guard passes, and ground-and-pound at your own pace, building the muscle memory that translates directly to live rolling.
Disclosure: This article contains affiliate links. As an Amazon Associate, we may earn from qualifying purchases.
Quick Picks
Quick Picks Before You Scroll
If you already know what you need, start with these options. For sizing, tradeoffs, and use-case notes, read the full comparison below.
Fast pick
Recommended option
Use this as a starting point, then compare fit, materials, use case, and tradeoffs in the full guide below.
We’ve researched and evaluated the 7 best grappling dummies available in 2026, covering everything from premium competition-grade models to budget options for home training.
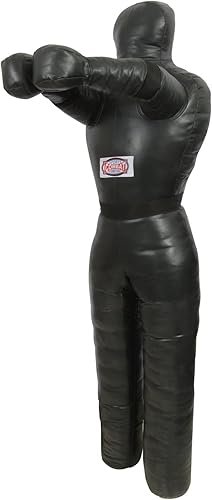
1. Combat Sports Legged Grappling Dummy — Best Overall
Combat Sports Legged Grappling Dummy
★★★★★ 9.3/10
Combat Sports International has been a fixture in martial arts equipment for decades, and their legged grappling dummy remains the industry benchmark. What sets this dummy apart is its realistic articulated leg design — unlike armless bag-style dummies, the legs allow you to practice full guard positions, leg locks, triangles, and realistic mount transitions. The heavy-duty vinyl construction handles aggressive drilling without ripping or losing shape, and the triple-stitched seams ensure long-term durability even under daily use.
Pros
Articulated legs for realistic guard and leg lock drills
Heavy-duty vinyl construction is extremely durable
Triple-stitched seams resist tearing
Multiple size options available
Industry-standard quality trusted by gyms worldwide
Cons
Premium price — this is a serious investment
Sold unfilled — filling material adds to total cost
Heavy when filled — difficult to store in small spaces
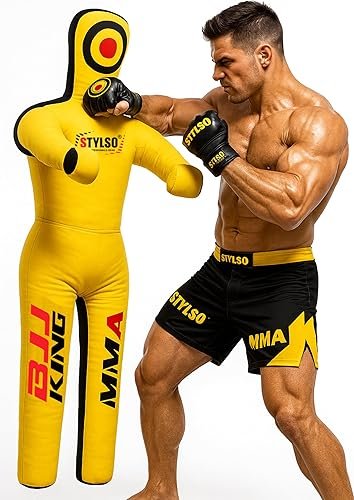
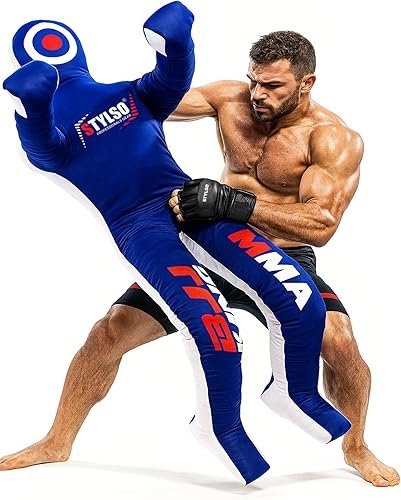
2. Stylso Standing Grappling Dummy — Best for Takedowns
Stylso Standing Grappling Dummy
★★★★★ 9.0/10
The Stylso Standing Grappling Dummy is built for fighters who want to drill takedowns, throws, and clinch work without a live partner. Available in 5ft and 6ft versions, it simulates a real standing opponent that you can shoot doubles and singles on, practice hip throws, and work your clinch game. The outer shell is made from durable synthetic leather with reinforced stitching at all stress points. Once properly filled, it maintains its standing position well enough to practice controlled entries while being light enough to actually take down and transition to ground work.
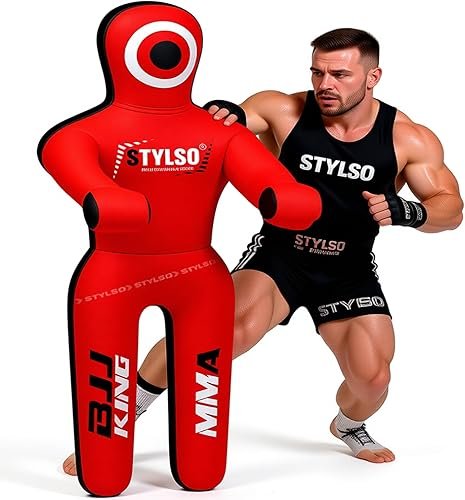
3. Stylso Wrestling Grappling Dummy — Best for Wrestling
Stylso Wrestling Grappling Dummy
★★★★☆ 8.8/10
This Stylso variant is specifically designed for wrestlers and grapplers who focus on top-game dominance. The dummy’s body proportions are optimized for practicing wrestling-specific moves: sprawls, crossfaces, cradles, and pin combinations. It features a more compact build than the standing version, making it easier to manipulate into various positions on the mat. The reinforced neck area handles snap-downs and front headlock transitions without losing structural integrity. Whether you’re a high school wrestler training for states or an adult grappler drilling folkstyle techniques, this dummy hits the mark.
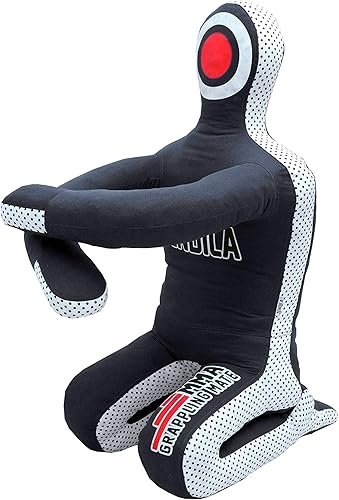
This purpose-built BJJ dummy is designed specifically for jiu-jitsu practitioners who want to drill submissions and sweeps at home. The proportions mimic a human training partner more accurately than generic dummies, with arm positioning that allows you to work armbars, kimuras, and triangle setups from multiple angles. The canvas and vinyl exterior can handle aggressive mat work without tearing, and the dummy maintains its shape well through repeated drilling sessions. Available in multiple sizes, it works for both adults and younger grapplers developing their game.
Pros
Realistic proportions for BJJ technique drilling
Arm positioning allows submission practice
Durable canvas and vinyl construction
Maintains shape through repeated use
Available in multiple sizes
Cons
Arms don’t resist — less realistic than live training
Filling material not included
Can be awkward to reposition quickly between drills
5. Legged MMA Grappling Dummy — Best for Ground & Pound
Legged MMA Grappling Dummy
★★★★☆ 8.5/10
For MMA fighters who need to practice both grappling transitions and ground-and-pound, this legged dummy delivers the versatility you need. The articulated legs allow you to work from full guard, half guard, and side control positions while the padded torso can handle moderate striking during positional drills. Made from heavy-duty canvas with double-stitched seams, this dummy is built to absorb the punishment that comes with realistic MMA training. The legs bend at natural angles, making it possible to practice leg locks, heel hooks, and kneebar entries — techniques that are risky to drill full-speed on live partners.
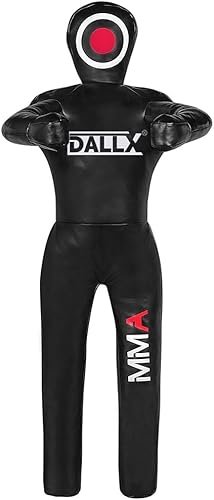
Not everyone has the budget for a premium grappling dummy, and the DALLX MMA offers solid value for recreational grapplers and beginners. Available in multiple sizes and colors, this unfilled dummy features a standing position design with arms positioned for clinch work and throwing practice. The construction uses durable synthetic leather with reinforced stitching — not as robust as premium models, but more than adequate for home training several times per week. For the price, you’re getting a legitimate training tool that will help you develop muscle memory for basic throws, takedowns, and transitions.
Pros
Excellent price-to-quality ratio
Multiple sizes and colors available
Standing position for throw and takedown practice
Reinforced stitching at stress points
Great entry-level option for home training
Cons
Synthetic material less durable than premium models
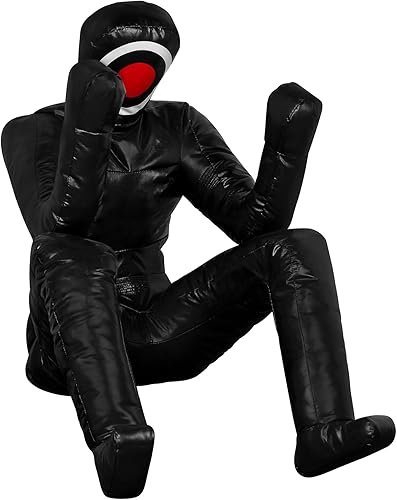
7. MMA Sitting Position Practice Dummy — Best for Guard Work
MMA Sitting Position Practice Dummy
★★★★☆ 8.4/10
While most grappling dummies focus on standing or lying positions, this sitting-position model occupies a unique niche that’s especially valuable for BJJ practitioners. The seated position is perfect for drilling guard passes, mount transitions, and back-take entries. You can also use it to practice striking from mount position and ground-and-pound scenarios. The pre-formed sitting shape means it naturally stays in position without toppling, making solo drilling sessions smooth and efficient. It’s also easier to fill than standing models because the weight distribution is more concentrated.
Pros
Unique sitting position for guard and mount drills
For serious grapplers, the Combat Sports Legged Grappling Dummy is the gold standard — its articulated legs unlock techniques that armless dummies simply can’t replicate. For a more affordable all-around option, the Stylso Standing Grappling Dummy offers excellent versatility for takedowns and ground transitions.
Head-to-Head Comparisons: Helping You Decide
Combat Sports Legged vs. Stylso Standing — Top Tier Battle
This is the most common comparison for serious grapplers deciding between a legged and standing dummy. The Combat Sports Legged model excels at ground game drilling — its articulated legs unlock guard work, leg locks, triangles, and realistic mount transitions that are impossible with armless standing dummies. The Stylso Standing model is more versatile for combat athletes who split their training between standing (takedowns, clinch) and ground work.
Choose the Combat Sports Legged if: Your primary focus is BJJ or submission grappling, you want to practice leg locks and guard techniques, you prioritize ground game development over takedown drilling, or you train primarily in no-gi where leg entanglements are a major part of the game.
Choose the Stylso Standing if: You need to practice takedowns and throws regularly, you train in MMA or wrestling where the standup phase is critical, you want a more versatile dummy that covers both standing and ground work, or your budget requires a more affordable option.
Stylso Wrestling vs. Pro MMA BJJ — Wrestling vs. Jiu-Jitsu
These dummies represent the different demands of wrestling and BJJ training. The Stylso Wrestling model is built for the physicality of wrestling — compact build, reinforced neck, and proportions optimized for sprawls, cradles, and pin combinations. The Pro MMA BJJ model has proportions that facilitate submission drilling from multiple positions.
Choose the Stylso Wrestling if: You compete in wrestling (folkstyle, freestyle, or Greco-Roman), you prioritize top-game control and pinning combinations, you need a dummy that handles the aggressive physicality of wrestling drills, or you train at a wrestling-focused gym and need a home supplement.
Choose the Pro MMA BJJ if: Your primary art is Brazilian Jiu-Jitsu, you want to drill submissions from guard, mount, and back control, you need a dummy with arm positioning that allows armbar and kimura practice, or you train primarily in the gi and want a dummy that works with gi grips.
DALLX MMA vs. Sitting Position — Budget Decisions
For budget-conscious buyers, the choice often comes down to a standing or sitting dummy. The DALLX MMA standing model offers takedown and throw practice along with basic ground work. The Sitting Position model is specifically designed for ground game drilling with exceptional stability.
Choose the DALLX MMA if: You want takedown and throw practice as your primary training goal, you need a versatile dummy for general MMA training, you’re a beginner exploring multiple martial arts disciplines, or you want a standing opponent for clinch work.
Choose the Sitting Position model if: Your focus is exclusively on ground game techniques, you want a dummy that stays in position without constant repositioning, you primarily drill guard passes, mount transitions, and back takes, or you have limited space and need a more compact training partner.
Advanced Grappling Dummy Training: Beyond the Basics
Timed Positional Rounds
Set a 5-minute timer and drill one position exclusively. For example: 5 minutes of mount maintenance and submission attacks. During those 5 minutes, rotate through every mount submission you know — armbar from mount, mounted triangle, Americana, Ezekiel choke, and cross collar choke. After each submission attempt, return to mount position and attack with a different technique. This builds the positional mastery that allows you to dominate in live rolling.
Track your performance over time. In your first session, you might complete 8-10 quality submission attempts in 5 minutes. As your transitions become smoother and your technique more refined, you should be completing 15-20 attempts in the same timeframe. This measurable progress is one of the great advantages of structured dummy training.
Flow Rolling Simulation
This drill simulates the flow of a live grappling exchange. Start in one position and transition through as many positions as possible in a continuous flow: mount → side control → north-south → opposite side control → knee on belly → mount → back control → armbar → guard (imagining the opponent escaped). The goal is smooth, continuous movement with no pauses or restarts. This develops the positional fluency that characterizes advanced grapplers.
Specific Scenario Drilling
Create specific competition scenarios and drill them repeatedly:
“Down on points with 30 seconds left”: Practice aggressive submission attempts from disadvantageous positions — attempting a Hail Mary submission when you’re behind on points.
“Up on points, need to maintain position”: Practice heavy pressure from top positions without attempting submissions — focusing purely on position maintenance and time management.
“Opponent just pulled guard”: Practice your immediate response to guard pulling — engaging the legs, establishing grips, and beginning your passing sequence.
“You’ve been taken down”: Start on your back with the dummy on top and practice immediate guard recovery, frames, and hip escape sequences.
Gi vs. No-Gi Specific Work
If you compete in both gi and no-gi, dedicate separate dummy sessions to each ruleset. In gi sessions, put an old gi on the dummy and focus on collar chokes, lapel guards, and grip-fighting entries. In no-gi sessions, focus on underhooks, overhooks, body lock positions, and no-gi specific submissions like guillotines and darces. This deliberate separation helps you develop distinct game plans for each ruleset rather than relying on a one-size-fits-all approach.
Explosive Repetition Training
Some techniques require explosive power — takedowns, sweeps, and submission finishes all benefit from explosive entry speed. Set a timer for 30-second intervals and perform each technique with maximum explosiveness: slam the takedown, rip the armbar, drive through the sweep. Rest 30 seconds between sets. This interval training builds the fast-twitch muscle recruitment that makes your techniques effective against resisting opponents.
The History of Grappling Dummies in Combat Sports
Grappling dummies have a surprisingly long history in martial arts training, predating modern commercial products by centuries.
Ancient Origins
Historical records suggest that grappling dummies in various forms have been used for centuries across multiple martial arts traditions. Japanese judo practitioners trained with straw-filled dummies called “uchikomi” training aids as early as the late 1800s. These crude but effective tools allowed judoka to practice throwing techniques thousands of times without a partner. The concept was simple: repetition builds expertise, and a dummy never gets tired or injured.
Military Applications
Modern grappling dummies evolved partly from military combat training tools. Military forces worldwide have used human-shaped training aids for close-combat instruction — teaching soldiers how to perform takedowns, restraints, and combatives techniques. The U.S. Marine Corps Martial Arts Program (MCMAP) has used grappling dummies for decades to train Marines in ground fighting scenarios. The durability requirements of military training drove manufacturers to develop the heavy-duty vinyl and reinforced stitching that characterize today’s best commercial dummies.
The BJJ Revolution
The explosion of Brazilian Jiu-Jitsu’s popularity in the 1990s and 2000s — driven largely by its dominance in early UFC events — created massive demand for solo training tools. BJJ practitioners needed dummies that could simulate guard positions, submission setups, and the ground-based transitions that are central to the art. This demand drove manufacturers to develop the articulated-leg designs and position-specific dummies that dominate the market today. Companies like Combat Sports International were among the first to recognize this market opportunity and develop products specifically for BJJ and MMA training.
Smart Dummies and the Future
The latest evolution in grappling dummy design incorporates innovative engineering to create more realistic training experiences. Products like the Grappling SMARTY 2.0 use internal structures that allow the dummy to maintain positions (hunched back, bent knees, posted arms) that conventional dummies can’t hold. Some experimental prototypes being developed by martial arts equipment companies incorporate flexible joints with resistance that can be adjusted, approaching something closer to a robotic training partner. While we’re still far from a dummy that can actually fight back, the trend toward more realistic training aids continues to accelerate.
Pro Fighter Training Routines With Grappling Dummies
Understanding how professional fighters incorporate dummy work into their training schedules can help you design a more effective solo training program.
The BJJ Competitor’s Weekly Dummy Schedule
Serious BJJ competitors often train on mats with partners 4-5 times per week. They supplement this live training with 2-3 dummy sessions per week, typically structured as follows:
Session 1 (30-40 min): Technique drilling focused on the competition game plan — the specific sequences they plan to use in upcoming tournaments. High repetition volume on 3-4 core techniques.
Session 2 (20-30 min): Weakness development — drilling techniques they struggle with in live training. This is where the dummy’s non-judgmental nature is most valuable.
Session 3 (15-20 min): Conditioning circuit using the dummy as a training tool — throws, carries, slams, and positional transitions at high intensity.
The MMA Fighter’s Integration
MMA fighters use dummies differently than pure grapplers. Their dummy work often integrates striking and grappling:
Takedown-to-GNP circuits: Shoot for the takedown, complete it, transition to mount, throw 10 ground-and-pound strikes, return to standing. Repeat 10 times.
Clinch-to-takedown chains: Enter the clinch on the standing dummy, perform a trip or throw, land in side control, transition to mount, attack a submission, reset. This builds the chain of events that constitutes a complete MMA grappling sequence.
Defense-to-offense transitions: Start on bottom (dummy in mount position), hip escape to guard, sweep the dummy, pass to side control, submit. This full defensive-to-offensive sequence builds the complete game that MMA fighters need.
The Weekend Warrior’s Efficient Approach
If you train at a gym 2-3 times per week and supplement with home dummy work, keep your sessions short and focused:
Before class days: 10-15 minutes of light technique review on the dummy. Focus on the techniques you’ve been learning in class to reinforce the movements before getting live reps that evening.
Non-class days: 20-30 minutes of structured drilling. Choose a position or technique family and work it systematically. End with a 5-minute conditioning circuit.
Weekend long session: One 45-60 minute session focused on game plan development. Identify your three highest-percentage techniques and drill them until they’re automatic.
Buying Guide: How to Choose the Right Grappling Dummy
Position Type: Standing vs. Sitting vs. Legged
The dummy’s default position determines which techniques you can effectively drill. Standing dummies are best for takedowns, throws, and clinch work. Sitting dummies excel at guard passes, mount transitions, and back takes. Legged dummies are the most versatile, allowing guard work, leg locks, and realistic positional drilling — but they’re also the most expensive and hardest to fill properly.
Size Selection
Match your dummy to your own size for the most realistic training experience. If you’re 5’10”, a 6ft dummy will feel realistic for standing work. For ground drilling, a slightly smaller dummy (5ft) is often easier to manipulate and more practical. If you’re buying for a youth wrestler or smaller martial artist, look for 3-4ft kid-specific models.
Fill Material
Almost all grappling dummies are sold unfilled, which means you need to choose your filling carefully. The most popular options are:
Old clothes and rags: Free, readily available, and provide decent weight distribution. The most common DIY filling.
Fabric scraps: Tighter packing than clothes, more consistent feel. Available cheaply from fabric stores.
Shredded foam: Lighter weight with some give, good for submission drilling where you need the limbs to flex slightly.
Sand (in bags): Added to the base or legs for stability. Never put loose sand directly into the dummy.
Pro tip: Start with a mix of old clothes for the core and shredded foam for the limbs. This gives you solid resistance in the torso with enough flexibility in the arms and legs to practice technique.
Material & Durability
Look for vinyl, genuine leather, or heavy-duty synthetic leather. Canvas is also used in some models and handles mat abrasion well. The most common failure point is the stitching — prioritize models with double or triple stitching, especially at the seams where limbs connect to the torso. These areas take the most stress during throws and submissions.
Weight When Filled
A properly filled 5ft grappling dummy typically weighs between 60-100 lbs depending on fill material. This is intentional — a heavier dummy provides more realistic resistance for drilling. However, consider storage and transport. If you need to move your dummy frequently, lighter filling like shredded foam makes life easier. If it stays in one spot on the mat, pack it tight for maximum training benefit.
Frequently Asked Questions
Are grappling dummies worth it for BJJ training?
Absolutely. While nothing fully replaces live rolling with a partner, grappling dummies are invaluable for building muscle memory on specific techniques. They’re especially useful for drilling submissions (armbars, triangles, kimuras), takedown entries, and transitions. Many black belts credit solo dummy work with accelerating their development, particularly for techniques that are dangerous to drill at full speed on live partners, like heel hooks and slams.
What should I fill my grappling dummy with?
The most popular and cost-effective filling is old clothes and fabric scraps. Cut them into strips and pack tightly for realistic resistance. For a more professional feel, use a combination of shredded foam for the limbs (allows some flexibility) and tightly packed fabric for the torso (provides solid resistance). Some practitioners add small sandbags to the base for added stability. Avoid using loose sand, sawdust, or other materials that could leak through the seams.
How heavy should a grappling dummy be?
A good target weight is roughly 50-70% of your body weight. For a 180 lb person, a 90-120 lb dummy provides realistic resistance without being impossible to move. Lighter dummies (50-70 lbs) are better for speed drilling and technique work, while heavier dummies (100+ lbs) are better for strength conditioning and throw practice. You can always adjust the weight by adding or removing fill material.
Can I use a grappling dummy for MMA training?
Yes. Grappling dummies are used extensively in MMA training for takedowns, ground-and-pound positioning, submission transitions, and even some standing clinch work. For MMA-specific training, choose a dummy with legs (for guard and leg lock drilling) and enough padding in the torso to handle moderate strikes. Many MMA fighters use dummies for conditioning circuits — slamming, dragging, and throwing the dummy builds functional strength that translates directly to fighting.
Standing vs. sitting grappling dummy — which is better?
It depends on your training focus. Standing dummies are more versatile — you can practice takedowns, throws, and then transition to ground work. Sitting dummies are better for focused ground game drilling: guard passes, mount transitions, back takes, and ground-and-pound from dominant positions. If you can only buy one, a standing dummy with decent weight distribution gives you the most training options. If your primary focus is BJJ guard work, a sitting dummy may serve you better.
How do I maintain my grappling dummy?
Wipe down the exterior with a damp cloth and mild antibacterial cleaner after training sessions. Allow it to air dry completely before storing. Check stitching regularly for signs of wear, especially at limb attachment points. If you notice seams loosening, reinforce them with heavy-duty thread before they tear further. Store in a dry area away from direct sunlight, as UV exposure can degrade both vinyl and leather materials over time. If the filling compresses unevenly, remove it periodically and redistribute or add more material.
Detailed Product Specifications Breakdown
When comparing grappling dummies side by side, the technical details reveal important differences that marketing descriptions often overlook. Here’s a detailed breakdown of each product’s key specifications.
Combat Sports Legged Grappling Dummy
Material: Heavy-duty vinyl with reinforced seams — industrial-grade PVC rated for continuous heavy use
Stitching: Triple-stitched at all stress points with heavy-duty nylon thread — the strongest construction in this roundup
Limb Design: Fully articulated legs with functional knee bends — arms with limited range of motion for clinch positioning
Available Heights: Multiple sizes from youth (3ft) to adult XL (6ft+)
Approximate Filled Weight: 80-120 lbs depending on size and fill material
Fill Opening: Large rear zipper closure for easy filling and adjustment
Position: Versatile — can be positioned standing, sitting, or lying
Country of Manufacture: United States
Brand Heritage: Combat Sports International — decades of professional martial arts equipment manufacturing
Stylso Standing Grappling Dummy
Material: Premium synthetic leather exterior with canvas reinforcement at high-stress zones
Stitching: Double-stitched at all seams with reinforced panels at limb attachment points
Limb Design: Fixed-position arms at shoulder height — no articulated legs
Available Heights: 5ft (60″) and 6ft (72″)
Approximate Filled Weight: 60-90 lbs depending on fill material
Fill Opening: Large side zipper with reinforced zipper pull
Position: Standing — designed for takedowns and clinch work
Available Colors: Black, Blue, Red, Yellow
Stylso Wrestling Grappling Dummy
Material: Synthetic leather with canvas base layer — selected for mat abrasion resistance
Stitching: Double-stitched throughout with reinforced neck attachment
Limb Design: Compact arms positioned for wrestling underhook and overhook drills
Available Heights: 5ft and 6ft
Approximate Filled Weight: 55-80 lbs depending on fill material
Fill Opening: Top opening with drawstring closure
Position: Standing — optimized for wrestling-specific techniques
Available Colors: Multiple color options
Pro MMA BJJ Grappling Dummy
Material: Canvas and vinyl hybrid construction — canvas body with vinyl reinforcement at high-wear areas
Stitching: Double-stitched with bar-tacked stress points
Limb Design: Arms positioned for armbar and kimura practice — proportional to human body dimensions
Available Heights: 5ft standard
Approximate Filled Weight: 50-75 lbs depending on fill material
Fill Opening: Rear zipper closure
Position: Versatile — standing or lying
Legged MMA Grappling Dummy
Material: Heavy-duty canvas with double-layer construction at torso and leg attachment points
Stitching: Double-stitched throughout with reinforced seams at leg joints
Limb Design: Articulated legs with natural bend angles — arms at chest height for clinch work
Available Heights: 5ft standard
Approximate Filled Weight: 70-100 lbs depending on fill material
Fill Opening: Multiple fill ports — main body and individual leg fills
Position: Versatile — standing, sitting, or supine
DALLX MMA Grappling Dummy
Material: Synthetic leather (PU) with basic reinforcement at primary stress points
Stitching: Standard double-stitching — adequate for regular home training but not designed for daily professional use
Limb Design: Arms positioned at chest height for basic throw and clinch practice
Available Heights: 5ft standard with multiple size options available
Approximate Filled Weight: 45-65 lbs depending on fill material
Fill Opening: Rear zipper closure
Position: Standing
Available Colors: Multiple options including Black, Red, Blue
MMA Sitting Position Practice Dummy
Material: Vinyl exterior with foam-backed interior for added padding during ground-and-pound practice
Stitching: Double-stitched with reinforced base for stability
Limb Design: Arms at sides for guard pass and mount drilling — pre-formed sitting position
Available Heights: 4ft (seated height approximately 2.5ft)
Approximate Filled Weight: 40-60 lbs depending on fill material
Fill Opening: Rear opening with zipper closure
Position: Sitting — designed specifically for ground game drilling
How to Fill a Grappling Dummy Properly
The way you fill your grappling dummy dramatically affects its training value. A poorly filled dummy is either too floppy to maintain positions or too stiff to manipulate realistically. Here’s our step-by-step guide to getting it right.
Step 1: Gather Your Fill Materials
You’ll need a combination of materials for different parts of the dummy. For a standard 5ft dummy, plan on gathering:
15-25 lbs of old clothes: T-shirts, jeans, towels, and bedsheets work best. Cut them into strips for easier packing. Avoid bulky items like winter coats that create uneven lumps.
5-10 lbs of shredded foam: Available at fabric stores or online. This goes in the limbs for flexibility while maintaining shape.
2-3 small sandbags (optional): 5 lb sandbags placed in the feet or base of the dummy add stability. Always use sealed bags — never pour loose sand directly into the dummy.
Pool noodles (optional): One or two pool noodles cut to length can be used as a spine, giving the torso structure that helps the dummy maintain an upright position.
Step 2: Start With the Extremities
Begin by filling the hands and feet. Use tightly rolled strips of fabric pushed down into the fingers and toes of the dummy. Pack these firmly — the extremities are the hardest part to fill evenly, and doing them first ensures they don’t get neglected. If the dummy has articulated fingers, fill each finger individually for a more realistic grip feel.
Step 3: Fill the Limbs
Arms and legs should be firm but not rigid. Use a mix of shredded foam and fabric strips, alternating layers and tamping down firmly with a broomstick or wooden dowel. The key is consistency — you want even density throughout the limb with no empty pockets that create floppy spots. Arms should be firm enough to stay in position when you drape them over your shoulder during clinch drilling, but flexible enough to bend at the elbow for armbar practice.
Step 4: Build the Core
The torso is where you want the most mass and density. Pack old clothes as tightly as possible, using the broomstick to compress each layer before adding the next. If you’re using a pool noodle as a spine, position it centrally and pack material around it. The chest and midsection should feel solid when you squeeze the dummy — this is what provides realistic resistance during mount and side control drilling.
Step 5: Shape the Head and Neck
The head needs to be firm enough to grip during guillotine and headlock practice. Use tightly wadded fabric and pack it until the head maintains its shape when you squeeze it. The neck should have some flexibility — overpacking the neck makes it impossible to practice collar chokes and head-and-arm chokes realistically.
Step 6: Final Adjustments
Once fully filled, spend time with the dummy on the mat. Test it in various positions: mount, side control, guard, back control. If any area feels too loose or too stiff, open the filling port and adjust. It’s common to add or remove material over the first few training sessions until the dummy feels right for your drilling style.
Solo Training Drills With Your Grappling Dummy
The Positional Flow Drill
This drill builds transitions between dominant positions. Start in mount, transition to side control, then to north-south, then to the opposite side control, then back to mount. Perform each transition slowly and deliberately, focusing on maintaining heavy pressure and hip control throughout. Do 5 complete cycles, rest 30 seconds, then repeat in the opposite direction. As you improve, increase speed and add submissions at each position.
The Submission Chain Drill
From mount position, attempt an armbar. When you “feel” the dummy defending (simulate the defense yourself), transition to a triangle. From the triangle, switch to an omoplata. From the omoplata, sweep to mount and restart. This teaches the flowing submission-chain game that high-level BJJ practitioners use. Do each chain 10 times from each side. The dummy won’t actually defend, but visualizing the defense and reacting to it builds the neural pathways you need in live training.
The Takedown Circuit
Using a standing dummy, perform 10 double-leg takedowns from proper stance. Finish each takedown by passing to side control. Return the dummy to standing position and repeat with single-legs. Then blast doubles. Then fireman’s carries. This circuit builds explosive takedown entries and the conditioning to maintain them through a full match. Rest between sets as needed, but push the pace to simulate competition intensity.
The Guard Pass Gauntlet
Position the dummy in closed guard (if legged) or on its back. Perform 5 different guard passes in sequence: knee slice, torreando, over-under, leg drag, and stack pass. After each successful pass, return to the starting position before attempting the next technique. This systematic approach ensures you develop multiple passing options rather than relying on a single go-to pass.
The Back Attack Series
Start by taking the back of the dummy with both hooks in and a seatbelt grip. Practice the rear naked choke 5 times from each side. Then drill transitioning from back control to armbar when the “opponent” defends the choke. Then practice transitioning from back control to bow-and-arrow choke. This series develops the systematic back attack game that wins tournaments at every level.
Conditioning Circuits
Grappling dummies aren’t just for technique — they’re excellent conditioning tools. Try this circuit:
30 seconds: Pick up and slam the dummy (standing to mat)
30 seconds: Ground-and-pound from mount
30 seconds: Drag the dummy across the mat (simulating dragging an opponent)
30 seconds: Lift and carry the dummy (fireman’s carry position)
Rest 60 seconds, repeat 3-5 rounds
This builds the specific muscular endurance and grip strength you need for grappling. It’s brutally effective and replicates the metabolic demands of a real match far better than running on a treadmill.
Types of Grappling Dummies Explained
Not all grappling dummies are created equal, and understanding the different types helps you choose the right one for your training goals.
Standing Position Dummies
These dummies are designed to be filled and positioned upright, simulating a standing opponent. They’re the most versatile type for general martial arts training. You can practice takedowns, throws, and clinch work in the standing phase, then transition to ground work after completing the takedown. Standing dummies typically have arms positioned at chest or shoulder height, making them suitable for collar ties, underhooks, and overhook positions. The Stylso Standing and DALLX models in our roundup are examples of quality standing dummies.
Sitting Position Dummies
Sitting dummies are pre-shaped to maintain a seated or hunched position on the mat. They’re specifically designed for ground game practice: guard passes, mount transitions, back takes, and ground-and-pound positioning. Because they naturally stay in position without toppling, sitting dummies allow for smoother, more efficient solo drilling sessions. They’re also generally easier to fill because the weight distribution is more concentrated. The MMA Sitting Position Practice Dummy in our list is an excellent example.
Legged Dummies
The most realistic type, legged dummies have articulated legs that allow you to work from full guard, half guard, and various leg entanglement positions. They’re essential for BJJ practitioners who want to practice leg locks, triangles, and sweeps. The legs also allow more realistic mount and side control drilling because you can actually wrap your legs around the dummy’s legs for proper hooks and positioning. The Combat Sports Legged model is the gold standard here.
Throwing Dummies
Specifically designed for judo and wrestling throws, these dummies are shaped to be picked up, rotated, and slammed. They typically have reinforced torso construction to handle repeated impact and a compact build that’s easier to grip for hip throws and suplexes. While not specifically featured in our roundup, several of our picks (particularly the Stylso Standing) work well for throwing practice when properly filled.
Specialty/Smart Dummies
A newer category, smart dummies like the Grappling SMARTY 2.0 use innovative designs to maintain realistic body positions. They may include internal frameworks that allow the dummy to hold guard, turtle, or other defensive positions more naturally. These premium options come at a significant cost increase but provide the most realistic solo training experience available.
Grappling Dummy vs. Live Training Partner: Honest Comparison
Let’s be real about what a grappling dummy can and can’t do compared to a live training partner:
What Dummies Do Better
Always available: Your dummy never cancels, never gets sick, and trains at 3 AM if you want.
Safe technique drilling: Practice heel hooks, neck cranks, and slams at full speed without risk of injuring a partner.
Repetition volume: You can drill 100 armbars in a row without a partner getting tired or annoyed. This high-volume repetition is how you build unconscious competence.
No ego involvement: You can restart a technique from scratch without worrying about “winning” or looking good.
Conditioning: Dummy circuits build specific grappling fitness without the cognitive demands of live sparring, allowing pure physical conditioning.
What Live Partners Do Better
Resistance and adaptation: A live partner resists, counters, and creates the dynamic problem-solving that makes grappling an art. Dummies don’t fight back.
Timing and sensitivity: You can’t develop “feel” — the subtle weight shifts, tension changes, and postural cues that expert grapplers read — from a dummy.
Realistic defense: Dummies don’t frame, grip fight, or create angles. You won’t learn to deal with an opponent’s defensive reactions from solo drilling alone.
Cardio in context: Live rolling integrates technical decision-making with physical exertion in a way that dummy work can’t replicate.
Mental game: Competition anxiety, composure under pressure, and the ability to execute while someone is actively trying to submit you — these skills only develop in live training.
The Optimal Approach
The best training approach combines both. Use your grappling dummy for high-volume technique drilling, conditioning, and practicing dangerous techniques. Use live training partners for timing development, problem-solving, and pressure testing. A common split is 2-3 gym sessions per week with partners, supplemented by 2-3 solo dummy sessions at home. This combination builds both the technical vocabulary and the live application skills that produce well-rounded grapplers.
Price Ranges: What to Expect at Each Budget Level
Under $80 CAD — Entry Level
At the entry level, you’ll find basic standing and sitting dummies made from lightweight synthetic materials. These work well for beginners and casual hobbyists training at home 2-3 times per week. Construction quality is adequate but not exceptional — expect some stitching to loosen after several months of heavy use. The DALLX MMA Grappling Dummy is a solid entry-level option that punches above its weight class for the price.
$80-$150 CAD — Mid-Range
The sweet spot for most home grapplers. Mid-range dummies use higher-quality materials, reinforced stitching, and more realistic body proportions. The Stylso models in our roundup sit in this range and offer excellent training value. At this price, you’re getting a dummy that will last 2-3 years of regular training without significant deterioration.
$150-$300 CAD — Premium
Premium dummies like the Combat Sports Legged model offer superior construction, articulated features, and materials that handle aggressive daily training. These are the choice of serious martial artists who train with their dummy 4-5 times per week and need it to maintain its shape and integrity over years of use.
$300+ CAD — Professional/Smart
At the top end, you’ll find dummies with innovative designs, internal frameworks, and premium materials. The Grappling SMARTY 2.0 lives in this tier, offering a training experience that approaches the realism of a live partner more closely than any conventional dummy. If grappling is your primary athletic pursuit and you train daily, the investment is justified by the training quality improvement.
Care and Maintenance Tips for Longevity
Regular Cleaning
After every training session, wipe down your dummy’s exterior with a damp cloth and mild antibacterial soap or spray. This prevents bacterial and fungal buildup — especially important if you’re training shirtless or in humid conditions. Focus on areas where your body contacts the dummy most: the neck, torso, and arm attachment points. Allow the dummy to air dry completely before storing.
Stitching Inspection
Every 2-4 weeks, inspect all seams carefully. The most vulnerable areas are where limbs attach to the torso and the fill opening. Look for loose threads, stretched stitching, or small tears. Address any issues immediately by reinforcing with heavy-duty thread and a leather needle — small tears quickly become large ones under training stress. A $2 needle and thread fix now prevents a $100+ replacement later.
Storage
Store your dummy in a cool, dry area away from direct sunlight. UV exposure degrades both vinyl and leather materials over time, causing cracking and color fading. If your training space is in a garage or basement, consider a breathable cover to protect against dust while allowing moisture to evaporate. Never store a sweaty dummy in a sealed bag — this creates the perfect environment for mold and mildew.
Fill Maintenance
Every 2-3 months, check the fill density in all areas. Repeated training compresses filling material, creating uneven spots that reduce training realism. Open the fill port and redistribute material as needed, adding fresh filling to areas that have compressed significantly. The head, arms, and legs tend to lose density fastest because they’re manipulated most during training.
Surface Treatment
For vinyl dummies, apply a vinyl protectant spray every 3-4 months to maintain flexibility and prevent cracking. For leather dummies, use leather conditioner on the same schedule. For synthetic leather, a simple wipe with a damp cloth and occasional application of a UV protectant spray is sufficient. These small maintenance steps can double the lifespan of your dummy.
🤼
StrikeGear HQ Editorial Team
Our team of combat sports enthusiasts tests and reviews training gear to help fighters and coaches make informed equipment decisions. We have no brand affiliations — we recommend what works.
Building a Complete Home Grappling Gym
A grappling dummy is the centerpiece of a home grappling gym, but it works best as part of a complete training environment. Here’s how to build out your home grappling space for effective solo and partner training.
Essential Equipment
Grappling Dummy (1): Your primary solo training tool. Choose based on our recommendations above, matching the dummy type to your primary discipline and training goals.
Training Mats: This is non-negotiable for safe training. You need at minimum a 10×10 ft area covered with proper martial arts mats — at least 1.5 inches thick for takedown practice. Puzzle-style interlocking mats are the most affordable option, while roll-out mats provide a smoother surface with fewer seams. Budget: $200-600 CAD depending on area coverage and mat quality.
Gi and/or No-Gi Attire: Even for solo training, wearing proper training attire helps build realistic muscle memory. Gi work requires the friction and grips that a gi provides; no-gi work needs rashguard and shorts that replicate competition conditions.
Timer: Structure your solo training with a timer. Standard grappling rounds are 5 minutes with 1-minute rest. A visible timer keeps your sessions disciplined and prevents the common trap of endless unfocused drilling.
Recommended Additions
Pull-Up Bar: Pull-ups and hanging exercises build the grip strength and pulling power that are essential for grappling. Add towel pull-ups (hanging a towel over the bar and gripping the towel) for sport-specific grip training.
Resistance Bands: Band work replicates many grappling movements — shooting for takedowns, hip escaping, and bridging. They’re affordable and take up zero floor space.
Foam Roller: Grappling training beats up your body. A foam roller is essential for post-training recovery, particularly for the thoracic spine, hips, and shoulders that take the most stress during grappling.
Mirror: A full-length mirror allows you to check your technique during solo drills. Seeing yourself perform a technique reveals errors that you can’t feel from inside the movement.
Instructional Videos/Subscription: Solo dummy work is most productive when you know exactly what you’re drilling. Invest in a good instructional series or streaming subscription from a respected instructor in your discipline. This gives you a structured curriculum to follow rather than randomly drilling techniques.
Space Requirements
The minimum usable space for a home grappling area with a dummy is about 10×10 feet (100 square feet) with at least 8-foot ceilings. This gives you enough room to stand up the dummy, shoot takedowns, and transition to ground work without hitting walls. Ideally, you want 12×12 feet or larger — this extra space allows for more dynamic drilling including throws and guard pulling without constantly repositioning.
Solid Home Gym: Mid-range dummy + quality roll-out mats (12×12) + pull-up bar + resistance bands + gi = ~$500-750 CAD
Premium Training Space: Premium legged dummy + professional mats (14×14) + full equipment suite + instructional subscriptions = ~$1,000-1,500 CAD
Common Mistakes When Training With a Grappling Dummy
Even experienced grapplers sometimes fall into bad habits during solo dummy work. Avoid these common pitfalls to get the most out of your training time.
Mistake #1: Treating the Dummy Like a Dead Weight
The biggest mistake is mindlessly moving through techniques without visualizing a resisting opponent. When you drill an armbar on the dummy, imagine the opponent pulling their arm back, postural adjustments, and the precise hip position needed to finish. The dummy provides the physical resistance — you need to supply the mental engagement. Drilling without intent builds sloppy muscle memory that falls apart against live resistance.
Mistake #2: Only Drilling Your Best Techniques
It’s natural to gravitate toward techniques you’re already good at because they feel smooth and satisfying on the dummy. But solo dummy time is your best opportunity to develop weaker areas of your game. Spend at least 50% of your dummy training on techniques you struggle with in live rolling. The dummy won’t punish you for being awkward — use that safety to build competence before testing against live partners.
Mistake #3: Never Changing Tempo
Drilling at one speed — usually a comfortable medium pace — doesn’t prepare you for competition. Vary your tempo deliberately: slow-motion drilling for technique refinement, medium speed for building flow between positions, and explosive speed for competition simulation. Each tempo develops different qualities. Slow builds precision, medium builds smoothness, and fast builds the speed-under-pressure that wins matches.
Mistake #4: Skipping Transitions
Many practitioners drill individual techniques (armbar, triangle, sweep) without practicing the transitions between them. In live grappling, transitions are where most techniques succeed or fail. Use your dummy to practice flowing between positions: mount to side control to north-south to the other side control and back. Practice submission chains: armbar to triangle to omoplata and back. These transitions are what separate good grapplers from great ones.
Mistake #5: Ignoring Both Sides
Most grapplers have a dominant side and neglect their weak side during training. Solo dummy work is the perfect time to force yourself to drill equally from both sides. For every armbar from the right side, drill one from the left. For every single-leg on the right leg, shoot one on the left. Building ambidextrous capability doubles your offensive options and makes you significantly harder to predict in competition.
Mistake #6: No Structured Training Plan
Randomly drilling whatever technique comes to mind is better than not training at all, but it’s far less effective than following a structured plan. Organize your dummy sessions around themes: Monday is guard passing, Wednesday is submissions from mount, Friday is takedowns and transitions. Track your reps and progress. This systematic approach ensures balanced development and prevents you from unconsciously avoiding techniques you find challenging.
Discipline-Specific Dummy Training Recommendations
Brazilian Jiu-Jitsu (BJJ)
BJJ practitioners benefit most from legged dummies that allow guard work, or sitting dummies for mount and back take drilling. Key techniques to prioritize on the dummy include: armbar from mount and guard, triangle from guard, kimura from side control, back take and rear naked choke, hip escapes and guard recovery, and sweep sequences from open and closed guard. Focus on the transition points — the moments between positions where live opponents create space and opportunity.
Wrestling
Wrestlers should choose standing dummies for takedown and throw work. Essential dummy drills include: double-leg and single-leg takedown entries, fireman’s carries, duck-unders and arm drags, throw-by finishes, and sprawl-to-front-headlock sequences. Wrestlers can also use the dummy for conditioning circuits that mimic match intensity: shoot-slam-sprint-repeat builds the explosive endurance that wins wrestling matches.
Judo
Judoka benefit from standing dummies that can be gripped and thrown. Key techniques for dummy drilling include: hip throws (o-goshi, harai goshi), shoulder throws (seoi nage, morote seoi nage), foot sweeps (de ashi harai, okuri ashi harai — mimicked with the dummy), and transition from throw to ground pin. Judo throws generate significant impact, so choose a dummy with reinforced construction at the torso and neck.
MMA (Mixed Martial Arts)
MMA fighters need the most versatile dummy setup. Ideally, a standing dummy for clinch and takedown work combined with a separate sitting or legged dummy for ground work. Key MMA dummy drills include: clinch entries and dirty boxing, takedown-to-ground-and-pound sequences, wall work and cage wrestling simulation (if you have a wall to work against), submission entries from dominant positions, and ground-and-pound positioning drills.
Self-Defense
For self-defense practitioners, standing dummies offer the most relevant training scenario. Practice simple, effective techniques: basic takedowns, clinch control, creating space and escaping, striking from clinch and ground positions. Self-defense dummy training should emphasize speed and decisiveness over technical sophistication — the goal is to develop a small number of high-percentage responses that work under stress.
How to Choose the Right Size Grappling Dummy
Choosing the correct dummy size is more nuanced than simply matching the dummy’s height to your own. Different sizes serve different training purposes, and the “right” size depends on your primary training goals, physical attributes, and available space.
Height-to-Training Purpose Matrix
3-4 ft Dummies: Designed for youth martial artists (ages 6-14) or for specialized guard drilling by adults. Smaller dummies are easier to manipulate and lighter when filled, making them appropriate for younger athletes who lack the strength to move heavier models. Adults can also use smaller dummies for rapid-fire drilling when speed and volume matter more than simulating a realistic opponent size.
5 ft Dummies: The most versatile size for the majority of adults. A 5-foot dummy works well for practitioners between 5’4″ and 5’10” — it’s realistic enough for standing work while being manageable for ground techniques. When filled, a 5-foot dummy weighs approximately 60-80 lbs, making it heavy enough to provide resistance without being overwhelming. This is the recommended starting size for most home grapplers.
6 ft Dummies: Best for taller practitioners (5’10” and above) or for training realistic takedowns where the height difference matters. A 6-foot dummy filled to appropriate weight (80-100+ lbs) provides a challenging training partner for both standing and ground work. However, the increased size means more fill material, more storage space, and more effort to reposition between drills.
XL/70″+ Dummies: Specialty models for heavyweight fighters, law enforcement training, or gym environments where multiple practitioners of different sizes use the same equipment. These large dummies are difficult to manage solo and are best suited for structured gym training rather than home use.
Weight Considerations
The target weight of your filled dummy should match your training goals:
Light fill (40-60 lbs): Best for speed drilling, high-volume technique work, and conditioning circuits where you need to move the dummy quickly and repeatedly.
Medium fill (60-80 lbs): The sweet spot for most training. Provides realistic resistance for technique drilling while remaining manageable for extended sessions.
Heavy fill (80-120 lbs): Best for strength conditioning, realistic resistance drilling, and preparing for competition against opponents near this weight. Heavy dummies are physically demanding to train with but build the functional strength that translates to live grappling.
Body Proportion Considerations
Beyond overall size, the dummy’s body proportions matter. Some dummies have unrealistically thick torsos and thin limbs, which makes certain techniques feel awkward. Look for dummies with proportional limbs — arms thick enough to practice armbars and kimuras realistically, and legs (on legged models) wide enough to simulate closed guard. The Combat Sports Legged model excels here because its proportions were designed by actual martial artists rather than general manufacturers.
Material Comparison: Vinyl vs. Leather vs. Canvas
Vinyl (PVC)
The most common material for grappling dummies, vinyl offers a good balance of durability, water resistance, and affordability. High-quality vinyl resists tearing, is easy to clean, and maintains its shape over time. The Combat Sports Legged Dummy uses premium vinyl that can handle years of aggressive training. Lower-quality vinyl may crack at fold points or develop a sticky texture over time, particularly in hot environments. When evaluating vinyl dummies, check the thickness — thicker vinyl (1.0mm+) is significantly more durable than thin vinyl shells.
Genuine Leather
Leather grappling dummies are premium products that offer the most realistic feel and maximum durability. Leather resists abrasion better than any synthetic material, develops a supple patina with age, and feels natural against skin during shirtless training. However, leather dummies cost significantly more, require regular conditioning to prevent drying and cracking, and are susceptible to mold in humid storage environments. If you’re willing to invest in the premium product and maintain it properly, a leather dummy will outlast any synthetic alternative.
Canvas
Canvas dummies use heavy-duty woven fabric similar to military duffle bags. Canvas is extremely durable against tearing and abrasion, lightweight, and breathable. It handles the mat friction of ground work better than smooth vinyl because the textured surface doesn’t slide as much on training mats. The downside is that canvas absorbs sweat and moisture more readily than vinyl, requiring more diligent cleaning and drying. Several of the mid-range dummies in our roundup use canvas-vinyl hybrid construction — canvas body with vinyl reinforcement at high-stress areas.
Synthetic Leather (PU/Polyurethane)
Synthetic leather attempts to capture the feel of genuine leather at a lower price point. Modern PU leather is significantly better than the cheap imitation leather of past decades — it can look and feel remarkably similar to genuine leather when done well. It’s easier to clean than canvas, more resistant to moisture than leather, and more durable than basic vinyl. The trade-off is that it doesn’t breathe as well as canvas and won’t develop the character that genuine leather gains over time. The DALLX MMA and several Stylso models use high-quality synthetic leather to good effect.
Grappling Dummy Accessories and Add-Ons
Several accessories can enhance your grappling dummy training experience and extend the life of your equipment.
Dummy Gi/Rashguard
Putting an old gi jacket on your grappling dummy transforms the training experience for BJJ practitioners. With a gi on the dummy, you can practice collar chokes, sleeve grips, lapel guards, and gi-specific submission sequences. This is the single best accessory investment you can make if you primarily train gi jiu-jitsu. Use an old, worn-out gi that you wouldn’t wear to class — the dummy training will accelerate its deterioration.
Wall Mount Kit
Some manufacturers offer wall mounting brackets that let you hang your dummy from a wall at standing height. This is particularly useful for clinch work, knee strikes, and dirty boxing drills where you want the dummy to remain upright and at a consistent height. Wall-mounted dummies also save floor space when not in use.
Fill Kits
Several companies sell pre-made fill kits specifically designed for grappling dummies. These kits typically include shredded foam, fabric batting, and sometimes small sandbags — everything you need to fill your dummy to an optimal weight and consistency. While more expensive than using old clothes, fill kits produce a more even, consistent result that feels more realistic during training.
Replacement Covers
If the outer shell of your dummy wears out before the frame or fill, some manufacturers sell replacement covers that allow you to effectively rebuild the dummy at a fraction of the cost of buying new. Check whether replacement covers are available before purchasing — this can extend the effective lifespan of your investment by 2-3 additional years.
Training Mat Extensions
If your current mat space is barely adequate, adding modular puzzle mat extensions around the perimeter creates a safety buffer for throws and takedowns. A 2-foot extension around all sides of your existing mats dramatically reduces the risk of landing on hard floors during dynamic techniques. These extensions are relatively inexpensive and stack for storage when not in use.
Where to Buy Grappling Dummies in Canada
Canadian buyers have several options for purchasing grappling dummies, each with distinct advantages depending on your location, budget, and urgency.
Amazon.ca — Best for Selection and Convenience
Amazon Canada offers the widest selection of grappling dummies available to Canadian buyers, from budget models under $80 to premium options over $300. The primary advantages are free Prime shipping on many models, easy returns, and the ability to read verified customer reviews before purchasing. All seven dummies in our roundup are available on Amazon.ca. The main drawback is that you can’t physically inspect the dummy before buying — important because construction quality varies significantly between brands.
When ordering on Amazon.ca, check the shipping details carefully. Some dummies ship from within Canada (faster delivery, no customs), while others ship from the US or overseas (longer delivery times, potential duty charges). Products marked “Ships from and sold by Amazon.ca” typically arrive within 2-5 business days for Prime members.
Local Martial Arts Equipment Stores
Visiting a local store lets you feel the material quality, test the stitching, and assess the proportions before buying. However, most local stores stock a limited selection of grappling dummies — this is a specialty product that takes up significant retail floor space. Call ahead to check availability before making the trip.
Direct from Manufacturers
Some brands sell directly through their websites. Combat Sports International (combatsports.com) offers their full range directly, sometimes with bundle deals that include fill material. The Grappling SMARTY 2.0 is available through grapplingsmarty.com with occasionally better pricing than Amazon. Buying direct also gives you access to the full color and size range, which may not be completely represented on Amazon.
Used Grappling Dummies
Grappling dummies appear regularly on Facebook Marketplace, Kijiji, and local martial arts community boards. A quality used dummy at 40-50% of retail can be an excellent deal if you inspect it carefully. Check for:
Stitching integrity: Run your fingers along all seams, particularly where limbs attach to the torso. Any separation or loose threads indicates structural weakness.
Material condition: Look for cracks, tears, or excessive wear on the exterior. Vinyl that’s cracking is near end-of-life.
Fill condition: If the dummy comes filled, check for mold, odor, or uneven distribution. If unfilled, you’re essentially buying just the shell — make sure it’s in excellent condition to justify the price.
Zipper/closure condition: The fill opening needs to be fully functional. A broken zipper or worn closure makes refilling difficult.
Avoid buying used budget dummies — if they’re being sold, the previous owner likely wore them out. Used premium dummies (Combat Sports, Grappling SMARTY) are much safer bets because the quality construction means they have significant remaining useful life even after years of training.
DIY Grappling Dummy: Can You Build Your Own?
For budget-conscious martial artists or those who enjoy DIY projects, building a grappling dummy from scratch is a viable option. Here’s what you need to know about the DIY approach.
Materials Needed
Heavy-duty canvas or vinyl: 4-6 yards of material, depending on dummy size. Choose 12oz+ canvas or heavy vinyl rated for upholstery use.
Thread: Heavy-duty upholstery thread (nylon or polyester). Regular sewing thread will not survive grappling forces.
Sewing machine: A heavy-duty sewing machine capable of handling multiple layers of thick material. Standard household machines may struggle.
Pattern: Templates are available online (search for “grappling dummy sewing pattern”). Alternatively, trace the outline of a willing volunteer on large paper.
Fill material: Old clothes, shredded foam, or fabric batting — same as filling a commercial dummy.
Zipper or drawstring closure: Heavy-duty zipper rated for the material thickness, or a reinforced drawstring opening.
Estimated Cost and Time
A DIY grappling dummy typically costs $30-60 in materials — significantly less than even the cheapest commercial option. However, factor in 8-15 hours of construction time, depending on your sewing skills. If you don’t own a heavy-duty sewing machine, renting or borrowing one adds to the equation. For someone who sews regularly, a DIY dummy is an excellent value proposition. For someone without sewing experience, the learning curve may make a commercial purchase more practical.
Pros of DIY
Significant cost savings (50-80% less than commercial)
Custom sizing to match your specific training needs
Choice of materials (you can use genuine leather if desired)
Satisfaction of training with equipment you built yourself
Easy to repair since you understand the construction
Cons of DIY
Time investment is substantial, especially for beginners
Quality depends entirely on your construction skills
Stitching may fail under training stress if not done properly
No warranty or return policy
Proportions may not be as realistic as professionally designed models
Our Recommendation
If you have sewing skills and a heavy-duty machine, a DIY dummy is an excellent project that saves money and produces a customized training tool. If you don’t sew regularly, invest in a commercial dummy — the DALLX MMA or Stylso models offer good quality at prices that make DIY construction only marginally cheaper when you factor in time and potential mistakes.
Grappling Dummy Training for Different Skill Levels
White Belt / Beginner (0-1 Year)
As a beginner, your dummy training should focus on building familiarity with fundamental positions and basic techniques. Don’t try to drill advanced submissions or complex chains — focus on:
Position recognition: Practice getting into and maintaining mount, side control, back control, and guard. Feel what each position should feel like against the dummy’s weight.
Basic submissions: Armbar from mount, rear naked choke from back control, and Americana from side control. Drill each one 20+ times per session from both sides.
Hip escapes: The single most important fundamental in grappling. Place the dummy in mount on top of you and practice hip escaping to guard recovery. Do this until it’s automatic — 50+ reps per session is not too many.
Basic takedowns: If using a standing dummy, practice double-leg and single-leg entries at slow speed, focusing on level change and penetration step mechanics.
Blue/Purple Belt / Intermediate (1-4 Years)
At the intermediate level, you should be drilling with more specificity and purpose. Your dummy work should target identified weaknesses and develop your competition game plan:
Submission chains: Practice flowing between submissions based on defensive reactions. Armbar → triangle → omoplata → sweep → pass → submit. Build 3-4 go-to chains that you can execute automatically.
Guard passing systems: Develop a systematic approach to passing. Drill your primary pass, your secondary option when the primary is defended, and your recovery when the pass is reversed.
Positional transitions: Flow between positions smoothly and with purpose. Every transition should include dominant positioning and submission threats. Time yourself — try to visit all major positions in under 60 seconds.
Competition preparation: Drill your opening sequences (guard pull → sweep → pass → submit or takedown → pass → submit) repeatedly. These opening sequences should be so automatic that you can execute them under the stress of competition.
Brown/Black Belt / Advanced (4+ Years)
Advanced practitioners use dummy work for refinement rather than fundamental development. At this level, your dummy sessions should focus on:
Micro-adjustments: Focus on the tiny details that make techniques effective against high-level opponents: grip positioning, weight distribution, hip angle, and timing of transitions.
New technique integration: When learning new techniques from instructionals or seminars, use the dummy to build initial muscle memory before testing in live training.
Competition-specific drilling: Replicate exact scenarios you expect to face in upcoming tournaments. If you know your opponent’s game, drill specific counter-strategies on the dummy.
Teaching preparation: If you teach classes, use the dummy to work through lesson plans and demonstration sequences before class.
Injury rehabilitation: During recovery from training injuries, the dummy allows you to maintain technique work at controlled intensity without the unpredictability of live rolling.
Legal and Safety Considerations for Home Grappling Training
Floor and Ceiling Safety
Throwing a grappling dummy can generate significant impact when it hits the floor. In apartments or upper-floor rooms, this can damage flooring and disturb neighbors below. Train on the ground floor whenever possible, and use proper martial arts mats that absorb impact. If you’re in an apartment, talk to your neighbors about your training schedule — it’s better to address the noise proactively than to receive complaints.
Ceiling height matters for standing work. You need at least 8 feet of clearance for standing throws and takedowns. If you’re working in a low-ceiling space like a basement, focus on ground techniques and seated/kneeling takedown entries rather than full standing throws.
Children and Pet Safety
Filled grappling dummies are heavy objects that can fall on children or pets if stored improperly. Always secure standing dummies against a wall or lay them flat when not in active use. Keep fill openings securely closed — small children could access filling materials that pose choking hazards. If your training space is accessible to children or pets, consider setting boundaries or using a gated area.
Injury Prevention During Solo Training
Solo grappling training carries specific injury risks that differ from partner training. Without a partner to tap to, there’s a temptation to drill throws and takedowns at full speed without a controlled landing. Always control the dummy through the full range of the technique — don’t just slam it. Maintain proper form even when tired; fatigue-related technique breakdown during solo training builds bad habits and can cause acute injuries to shoulders, knees, and back.
Warm up before every dummy session, just as you would before partner training. Dynamic stretches, light calisthenics, and gentle solo movement drills prepare your muscles and joints for the demands of grappling. Cold-starting a training session increases injury risk significantly.
What the Research Says: Effectiveness of Solo Training With Dummies
Sport science research supports the value of solo drilling for skill development, though with important caveats about how to maximize its effectiveness.
Motor Learning and Repetition
Research in motor learning consistently shows that high-volume repetition is the primary driver of skill automatization — the process of making a technique so ingrained that it can be performed without conscious thought. A study published in the Journal of Motor Behavior found that achieving automaticity in complex motor patterns requires approximately 3,000-5,000 repetitions. Grappling dummies make this volume achievable in a way that live partner training simply can’t match — your partner tires, resists inconsistently, and can only sustain so many repetitions before fatigue degrades the quality of practice.
Contextual Interference
The motor learning concept of “contextual interference” suggests that mixing multiple techniques in a single practice session leads to better long-term retention than drilling a single technique repeatedly (blocked practice). Applied to dummy training, this means your sessions should include multiple techniques performed in randomized or semi-randomized order rather than drilling 50 armbars followed by 50 triangles. The recommended approach is to organize drills into small sets (5-10 reps each) of different techniques, cycling through them multiple times.
Mental Rehearsal
Visualization research in sport psychology demonstrates that mental practice combined with physical practice produces significantly better results than physical practice alone. During dummy training, actively visualize your opponent’s reactions and defensive movements. Imagine the weight, resistance, and timing of a real opponent while performing techniques on the dummy. This mental engagement transforms empty repetition into purposeful practice that transfers more effectively to live situations.
The Transfer Gap
It’s important to acknowledge the limitations of dummy training. Research on skill transfer shows that the more dissimilar the practice environment is from the performance environment, the less direct transfer occurs. A dummy provides physical resistance but not the dynamic, unpredictable responses of a live opponent. This means dummy-trained techniques need to be tested and refined in live training to become truly reliable. The optimal training split includes both solo dummy work (for volume and technical refinement) and live partner training (for adaptation and timing development).
Disclosure: StrikeGearHQ.com earns from qualifying purchases through our affiliate links. This doesn’t affect our editorial independence or product recommendations. Last updated: April 2026.